Medium
Saws
The
smaller of the two is the saw that is worked the hardest of all the saws. It is
a 55cc saw with a 16" bar running semi-chisel chain. As it is the saw carrying
out the bulk of the work it should definately be a professional model. As much
of the carving work as possible should be carried out with this saw before picking
up a small carving saw. Time and excess wear and tear on the smaller saws will
be saved by working this way. Depending on the make of saw, it can often be fitted
with non standard bar and chain combinations for more specialised use.
The
larger saw should be in the 65-70cc range at least, to be able to drive a 24"
bar and chain setup. This is the saw most used for general blocking out and ripping
up logs into boards. In this size range most saws that are available are professional
models. I find that it is most useful to me to run a full chisel chain on this
setup. It copes well with the harder timbers.
For
those of a lighter build in particular, there is a clear advantage in having a
de-compression button on these saws. Makes for a lot less stress and strain in
starting them.
| |||
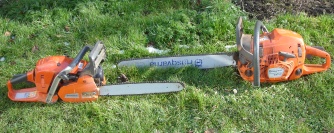
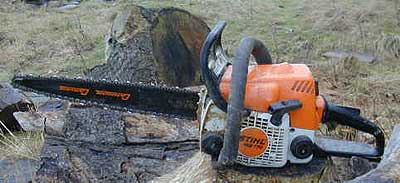
The
pictures below show two carving bars both 16", one a "dime tip" on a Stihl MS170
(left) and the other a "quarter tip" on a Stihl MS200. These bars are extremely
useful accessories for anyone involved in large scale woodcarving. In the hands
of someone well used to handling chainsaws, this bar can be manipulated in a very
delicate manner. It can cut fairly tight curves and rout out deep, comparatively
tight holes. One can write using the tip of the bar in a way that is impossible
with a standard bar. There is virtually no kickback making them extremely safe
to use in comparison to a standard guidebar. I also use a 12" version of either
bar for close up, more controlled, detailing.
| |||
 | 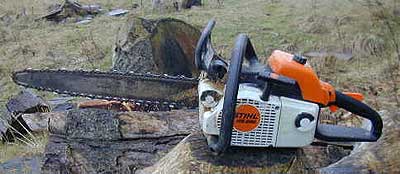 | ||
As
a word of warning however, it is not advisable to start using a carving bar as
a complete novice in the handling of chainsaws. If anyone was to attempt to try
this, then subsequently try to use a standard bar, they run a serious risk of
being caught by surprise and injured by kickback.
| |||
.Below is a close up of the tip of my 16" carving bar, it has a radius of about 12mm (quarter tip). The 12" bar has a radius of about 8mm (dime tip). These bars are made in Canada and are very well engineered. They are made from one piece of steel (rather than being laminated), the rails are triple induction hardened and the tip has a sizable section of stellite welded into it (as can be seen in the photo). They are solid nose bars and the gauge of the bar groove is 0.050". When first put to use it is advisable to run the chain relatively slack (i.e.hanging down with the tie straps just off the bottom bar rails) compared to the standard tension used with a solid nose bar. Initially there is a tendency for the bar to heat up a lot while both bar and chain are bedding in. This causes the chain oil to burn black which is then thrown off onto the carving making black lines. This normally passes after a few days of carving, then the chain can be run a little tighter (as a rough guide the bottom of the tang in the middle of the chain, hanging from the bottom of the bar, should be nearly visible). The black lines get fewer as the bar and chain bed in (as long as the saw oiler is working efficiently). The chain should be very easy to pull round the bar. It does very little harm for the bar tip to heat up to and turn blue as long as it isn't prolonged. This often occurs in heavy use.
The carving bars come in a variety of sizes and normally with three different types of tip. Smallest is about 8" useable length longest about 24" (there may be other sizes available from specialist suppliers). The three types of tip are "dime", "quarter" and "toonie",
Dime tip. The smallest radius. This is best being reserved for the final fine detailing work using the shorter bars. They don't hold up well to being used on overpowered saws or for heavier cutting. The small tip means that there is a lot of heat and friction built up there in heavy use, this can lead to early wearing out or stiffening up of the chain. The bar nose can also develop undue wear on the inside of the rails, even to the extent of the chain forcing the bar rails apart.
Quarter tip. Next size up. Where the "dime" compares to the size of the American coin of that name, the "quarter" compares to the size of that particular coin. This bar is more suited to a bit heavier work. The larger tip radius means that there is less concentration of heat as the load of the chain is spread over a longer length of bar rail. The tip of the bar is still small enough to use without having to worry overmuch about kickback. Just not quite as good as a dime for fine detail.
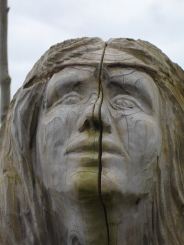 |
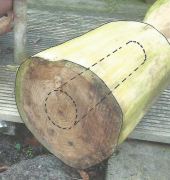
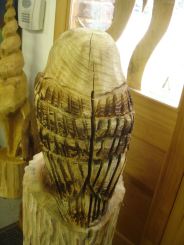
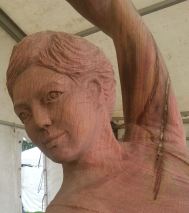
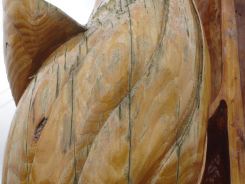
A carving ruined.
The centre "pith" of the log this was carved
from was situated 5cm behind the face. The crack took the shortest
distance between the pith and the exposed surface of the timber.
|
||||||||||||||||||||||||||||||||||||||||||||||||||
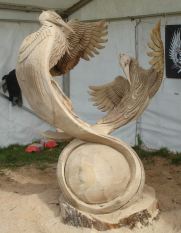
Large scale
wooden sculpture is more often than not, carved from a large section
log (250mm-1500mm plus, in diameter). In temperate countries like the
UK, anything above 250mm dia. and 1000mm long is unlikely to dry out
very much in less than two or three years even when under cover. In
fact, if the timber is not a naturally durable variety, then it is most
likely to rot before it dries out. So very large logs are not going to
lose anything like enough moisture to be considered dry or “seasoned
within 10 years or more of having been felled. In effect, the sculptor
of large logs is always working with what is normally termed “green
wood”.
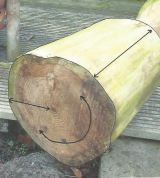
If a freshly
felled log of around 300mm dia by about 1000mm long is brought indoors
to a heated, dry environment.Or, placed out in the baking sun through an
extended, hot summer, it goes through a few stages on its’ way to
drying out. If it is standing up, then the top end will dry out very
quickly to a depth of an inch or so and start to form lots of small
cracks radiating out from the centre. The bottom will go damp and
mouldy and stain the floor or rot the carpet it stands on. If the log
is lying down, then both ends will crack in a similar manner and the
floor will mostly escape damage (if it is a round log).
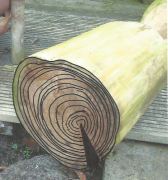
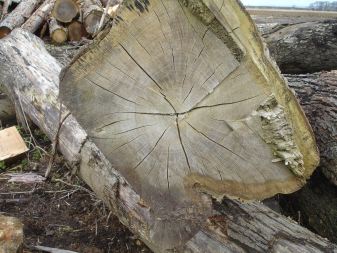
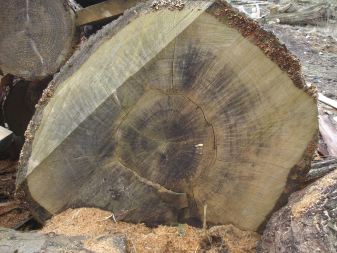
The next stage with a lot of species is that the bark will fall off (some species, e.g. ash will keep their bark depending on the time of year they have been felled). When the bark falls off the drying accelerates as the moisture is able to escape from the sides of the log as well as the ends. At this point the cracking at the ends of the log becomes more extensive. It is around this time that the log really starts to lose all the free water held trapped in the cells in the timber. That free water, up to this time, is what has been maintaining the dimensional integrity of the timber. Now it is only the core of the log that still contains that free water. The outside of the log along its length will now start to crack. This cracking, if it occurs in a living room in a house, can make the occupants jump, it can sound as loud as a pistol shot. So what is happening?
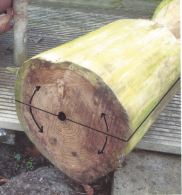
A freshly felled log
contains a lot of water. Some of this water is “free” water in that it
floods all of the spaces in the cells of the timber and is not bonded
to anything. When this has evaporated off the “fixed” water is the next
to be lost. This fixed water is actually bonded chemically to the
material making up the cells; it is part of the structure of the
timber. As this water is lost, the wood starts to shrink. On drying out,
the wood in the log moves in different ways as it shrinks through loss
of “fixed” water. There is very little shrinkage along the length of
the log, a fair amount of shrinkage radially, and a lot of shrinkage
circumferentially. The circumferential shrinkage can amount to nearly
10%.
| |||||||||||||||||||||||||||||||||||||||||||||||||||


No comments:
Post a Comment